Windshields may seem like mundane safety features, but they’re incredibly important. And although some chips or cracks can be repaired, it’s often necessary to replace them altogether.
Replacing a windshield is a detailed process that requires Windshields Direct LLC. Here’s what you should know to make the process as smooth as possible:
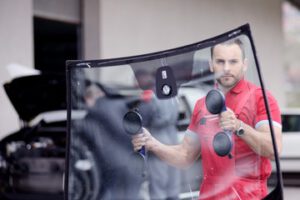
If you have doubts about replacing your windshield, it is best to go with a professional glass company that will give you a cash quote and handle the paperwork and payment for you. They will usually pay for the parts as well, and it will be cheaper than an insurance claim. The other option is to remove the windshield yourself. Getting the old glass off can be tricky because you are dealing with an incredibly fragile item that is easy to break.
Depending on the vehicle, you may have a lot of metal trim that needs to be removed first in order to separate the windshield from the car body. There are a few ways to go about this but we recommend using an extended handle razor knife and just repeating the same dragging motion that you used when installing the glass. This will make it much easier to avoid breaking the windshield. You can also use a power cutter, which will be faster but will do more damage to the pinch-weld.
Another option is to loosen the weatherstripping around the edge of the windshield. This can be done from the inside of the vehicle or outside of it, but you have to be careful because the metal trim that holds this on might be wedging this into place. It might help to apply foaming silicon spray to the wire as you go along. WD40 might work as well, but we have not tried it.
One other way to go about removing the windshield is to use a tool made by Harbor Freight. It is essentially a long utility knife with a blade at the end that you push into the seal between the windshield and the frame of the car. This is a bit more time consuming than the razor blade method but it has been very effective in avoiding breaking the windshield.
If you decide to use this tool, you should be very careful as it does cause some minor scratching. We recommend that you use it in a well ventilated area and with gloves. Once you have removed the windshield you will need to clean the urethane from the perimeter of the frame, and especially in the window channel. This is important because dirt here will interfere with the new glue.
Windshields are essential safety features for vehicle occupants, offering structural fortitude and optimal visibility on the road. As such, windshield replacement is a complex process that requires meticulous attention at every step to ensure safety and quality.
Before starting the actual repair, technicians assess the damage and determine whether a windshield can be repaired or needs to be replaced entirely. Small chips and cracks can usually be repaired, but larger, more complex damage like spider-web cracks or damage that compromises the driver’s line of vision typically necessitates a full replacement.
The next step is to clean and prep the frame for the new windshield. The old adhesive seal is cut using specialized tools and the frame is prepped to ensure that any remaining rust or corrosion is addressed and the new adhesive will bond effectively.
Once the frame is prepared, the technician begins removing the existing windshield. The old windshield is removed carefully and disposed of properly, with special care taken around cameras and sensors. The installer then prepares the new windshield for installation, cleaning it and ensuring that it is free from contaminants and debris. The installer then applies adhesive to the perimeter of the frame, ensuring that it is a continuous, even bead.
After the new adhesive has been applied, the windshield is then placed into place and pressed firmly against the vehicle frame. The windshield is also tested to ensure that it is properly bonded and has a tight seal. Finally, the windshield wipers and any other accessories are reattached to the new windshield.
Windshield installation is an intricate process involving the use of specialized tools and an understanding of how to work with windshields of different sizes and shapes. It is crucial that this process be done by a professional to avoid potential complications, which can range from leaks to glass detachment. To help ensure a smooth and successful installation, vehicle owners should be sure to follow the post-installation guidelines provided by their local auto glass repair shop.
For example, the first hour after a windshield replacement, it is important that the vehicle be left parked in a shaded area to allow the adhesive time to cure. It is also a good idea to avoid driving on bumpy roads for at least a few days following the repair, as excessive vibrations can interfere with the adhesion of the new windshield.
When applying the urethane, it’s important to use a quality product that is made specifically for windshield replacement. It’s also a good idea to apply a lubricant around the area you plan to seal. This will make it easier to slide the windshield out later if you need to.
When the urethane is applied to the window frame, it’s important to work quickly so it doesn’t dry before you put the new windshield in place. If you’re replacing the original windshield with a new one that is the same size, it’s a good idea to test fit the new windshield before you put the urethane down. This way, you can see if the center support tab or the two upper supports are in the correct position. If you don’t do this and the windshield ends up being off on one side you will have to move it again to correct it and you may end up with cracks in the glass.
Once you have a good bead of urethane on the pinch weld area, you’re ready to install the windshield. It’s important to be sure the wide base of the V bead lies on top of the pinch weld and that the tip of the V bead is touching the windshield to guarantee a proper bond and seal.
There are a number of things that can go wrong during an auto glass replacement job that can affect the performance of the windshield or car as a whole. A poor installation, improper adhesive selection or a hurried process can lead to problems like air whistles, water leaks, rust or distorted vision that will reduce driving safety and comfort. These problems can be avoided by following the steps outlined above and using professional materials and tools. A properly installed windshield will last the lifetime of your vehicle when it is replaced with an OEM or equivalent glass.
Once the new urethane has set, it’s time to install the windshield. It’s a good idea to have someone help you with this because the windshield can be very heavy and difficult to handle alone. Before you start, cover the front seats and dashboard with a blanket or tarp to protect them from glass, debris, and any leaking urethane.
It’s also a good idea to remove the wiper arms, cowling, or other pieces that may be in the way of installing the new windshield. Then use soapy water to lubricate the pinch-weld, car body and gasket before setting the new windshield in place. Some installers also use a bedding and glazing compound to seal the gap between the glass, the rubber, and the car body.
This step is very important and one that many Technicians skip or under-apply. It’s best to apply a thin coat of the bedding and glazing compound around the perimeter of the windshield where it touches the frame. This allows for a stronger bond and helps prevent leaks.
If you don’t have a bedding and glazing compound, it can be purchased at most auto parts stores. Follow the directions on the package to properly apply it. Then let it dry completely before you drive the vehicle again.
After installing the windshield, clean off the urethane on the edges of the frame. This will help to prevent it from drying and sticking to the windshield. It’s also a good idea to clean the inside of the window well to remove any dirt, grime or oil that could cause problems later.
It’s also a good idea to leave the vehicle for at least 3 days after having your windshield replaced. This is because the urethane adhesive needs a lot of time to fully set. Driving the vehicle too soon can cause the windshield to shift and dislocate from the car body. It can also ruin the integrity of the adhesive and cause cracks to develop in other areas. This puts your safety at risk and is not recommended by professionals.