Home » Articles posted by John Hensen
Author Archives: John Hensen
Tips For Replacing Windshields
Windshields may seem like mundane safety features, but they’re incredibly important. And although some chips or cracks can be repaired, it’s often necessary to replace them altogether.
Replacing a windshield is a detailed process that requires Windshields Direct LLC. Here’s what you should know to make the process as smooth as possible:

If you have doubts about replacing your windshield, it is best to go with a professional glass company that will give you a cash quote and handle the paperwork and payment for you. They will usually pay for the parts as well, and it will be cheaper than an insurance claim. The other option is to remove the windshield yourself. Getting the old glass off can be tricky because you are dealing with an incredibly fragile item that is easy to break.
Depending on the vehicle, you may have a lot of metal trim that needs to be removed first in order to separate the windshield from the car body. There are a few ways to go about this but we recommend using an extended handle razor knife and just repeating the same dragging motion that you used when installing the glass. This will make it much easier to avoid breaking the windshield. You can also use a power cutter, which will be faster but will do more damage to the pinch-weld.
Another option is to loosen the weatherstripping around the edge of the windshield. This can be done from the inside of the vehicle or outside of it, but you have to be careful because the metal trim that holds this on might be wedging this into place. It might help to apply foaming silicon spray to the wire as you go along. WD40 might work as well, but we have not tried it.
One other way to go about removing the windshield is to use a tool made by Harbor Freight. It is essentially a long utility knife with a blade at the end that you push into the seal between the windshield and the frame of the car. This is a bit more time consuming than the razor blade method but it has been very effective in avoiding breaking the windshield.
If you decide to use this tool, you should be very careful as it does cause some minor scratching. We recommend that you use it in a well ventilated area and with gloves. Once you have removed the windshield you will need to clean the urethane from the perimeter of the frame, and especially in the window channel. This is important because dirt here will interfere with the new glue.
Windshields are essential safety features for vehicle occupants, offering structural fortitude and optimal visibility on the road. As such, windshield replacement is a complex process that requires meticulous attention at every step to ensure safety and quality.
Before starting the actual repair, technicians assess the damage and determine whether a windshield can be repaired or needs to be replaced entirely. Small chips and cracks can usually be repaired, but larger, more complex damage like spider-web cracks or damage that compromises the driver’s line of vision typically necessitates a full replacement.
The next step is to clean and prep the frame for the new windshield. The old adhesive seal is cut using specialized tools and the frame is prepped to ensure that any remaining rust or corrosion is addressed and the new adhesive will bond effectively.
Once the frame is prepared, the technician begins removing the existing windshield. The old windshield is removed carefully and disposed of properly, with special care taken around cameras and sensors. The installer then prepares the new windshield for installation, cleaning it and ensuring that it is free from contaminants and debris. The installer then applies adhesive to the perimeter of the frame, ensuring that it is a continuous, even bead.
After the new adhesive has been applied, the windshield is then placed into place and pressed firmly against the vehicle frame. The windshield is also tested to ensure that it is properly bonded and has a tight seal. Finally, the windshield wipers and any other accessories are reattached to the new windshield.
Windshield installation is an intricate process involving the use of specialized tools and an understanding of how to work with windshields of different sizes and shapes. It is crucial that this process be done by a professional to avoid potential complications, which can range from leaks to glass detachment. To help ensure a smooth and successful installation, vehicle owners should be sure to follow the post-installation guidelines provided by their local auto glass repair shop.
For example, the first hour after a windshield replacement, it is important that the vehicle be left parked in a shaded area to allow the adhesive time to cure. It is also a good idea to avoid driving on bumpy roads for at least a few days following the repair, as excessive vibrations can interfere with the adhesion of the new windshield.
When applying the urethane, it’s important to use a quality product that is made specifically for windshield replacement. It’s also a good idea to apply a lubricant around the area you plan to seal. This will make it easier to slide the windshield out later if you need to.
When the urethane is applied to the window frame, it’s important to work quickly so it doesn’t dry before you put the new windshield in place. If you’re replacing the original windshield with a new one that is the same size, it’s a good idea to test fit the new windshield before you put the urethane down. This way, you can see if the center support tab or the two upper supports are in the correct position. If you don’t do this and the windshield ends up being off on one side you will have to move it again to correct it and you may end up with cracks in the glass.
Once you have a good bead of urethane on the pinch weld area, you’re ready to install the windshield. It’s important to be sure the wide base of the V bead lies on top of the pinch weld and that the tip of the V bead is touching the windshield to guarantee a proper bond and seal.
There are a number of things that can go wrong during an auto glass replacement job that can affect the performance of the windshield or car as a whole. A poor installation, improper adhesive selection or a hurried process can lead to problems like air whistles, water leaks, rust or distorted vision that will reduce driving safety and comfort. These problems can be avoided by following the steps outlined above and using professional materials and tools. A properly installed windshield will last the lifetime of your vehicle when it is replaced with an OEM or equivalent glass.
Once the new urethane has set, it’s time to install the windshield. It’s a good idea to have someone help you with this because the windshield can be very heavy and difficult to handle alone. Before you start, cover the front seats and dashboard with a blanket or tarp to protect them from glass, debris, and any leaking urethane.
It’s also a good idea to remove the wiper arms, cowling, or other pieces that may be in the way of installing the new windshield. Then use soapy water to lubricate the pinch-weld, car body and gasket before setting the new windshield in place. Some installers also use a bedding and glazing compound to seal the gap between the glass, the rubber, and the car body.
This step is very important and one that many Technicians skip or under-apply. It’s best to apply a thin coat of the bedding and glazing compound around the perimeter of the windshield where it touches the frame. This allows for a stronger bond and helps prevent leaks.
If you don’t have a bedding and glazing compound, it can be purchased at most auto parts stores. Follow the directions on the package to properly apply it. Then let it dry completely before you drive the vehicle again.
After installing the windshield, clean off the urethane on the edges of the frame. This will help to prevent it from drying and sticking to the windshield. It’s also a good idea to clean the inside of the window well to remove any dirt, grime or oil that could cause problems later.
It’s also a good idea to leave the vehicle for at least 3 days after having your windshield replaced. This is because the urethane adhesive needs a lot of time to fully set. Driving the vehicle too soon can cause the windshield to shift and dislocate from the car body. It can also ruin the integrity of the adhesive and cause cracks to develop in other areas. This puts your safety at risk and is not recommended by professionals.
Duties of a Plumber
Clearwater Plumbers work on pipes and fixtures that provide water, gas, waste disposal, and heating to homes and businesses. This industry is in demand and provides a good living for those who choose to go into it.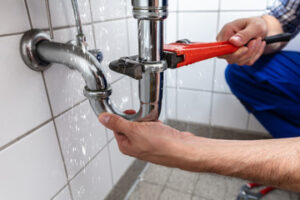
The job entails manual dexterity, analytical problem-solving skills, and interpersonal skills. It can also involve working with hazardous materials and being exposed to sewage.
Just like you change your car’s oil and get your tires checked, you should have your plumbing system inspected on a regular basis to prevent serious problems down the road. It’s more than just your sinks, toilets, and showers; your whole house’s water supply depends on a complex network of pipes to bring clean, fresh water in and waste water out. Keeping up with routine plumbing maintenance is one of the best ways to avoid expensive repairs and keep your family healthy and happy.
Plumbers install piping systems that provide fresh, safe water for homes and businesses. This includes piping that transports drinking and cooking water, as well as sewage and stormwater runoff.
In addition to installing new piping, plumbers also repair and maintain existing piping. They use a variety of tools to measure and mark the location for piping, cut and bend pipe to size, and connect fittings and fixtures. The type of piping installed in a home or business depends on the structure’s purpose. For example, a commercial building may require galvanized steel pipes, while a residential property can be fitted with PVC, PEX, or CPVC piping.
Plumbing companies can install and repair water heaters. They can also install and repair backflow preventers to protect against water pollution from untreated sewage. Finally, plumbers can install and repair septic systems and drain fields.
Proper plumbing maintenance can help you save money on your monthly water bill and prevent costly damage to your home or business. It can also promote a healthier living environment by preventing the growth of mold and mildew in your home.
In addition, a properly maintained plumbing system can increase the value of your property. Potential buyers are often concerned about the condition of a home’s plumbing, so having a well-maintained system can help you sell your property at a higher price. Besides preventing leaks and floods, regular plumbing maintenance can also ensure that your appliances and fixtures are working correctly and efficiently. This can extend their lifespan and reduce the amount of energy they consume. It can also help you avoid environmental hazards such as groundwater contamination and chemical leaching.
Plumbing Fixtures
Plumbing fixtures are a crucial part of your home’s water system. They are used multiple times a day, and they can wear down over time, becoming outdated or breaking down entirely. When this happens, it can cause issues like leaks and clogs that require expensive repairs or replacements. Upgrading to new plumbing fixtures can save you money and headaches in the long run, especially if you choose plumber-approved fixtures from reputable brands.
What are plumbing fixtures? Plumbing fixtures are the faucets, sinks, toilets, tubs, showerheads, and bidets that are connected to a home’s plumbing system. They are typically made from materials that can withstand repeated exposure to water, such as porcelain, plastic, copper, and stainless steel. They also usually have drains and stoppers for removing excess water, as well as valves to control the flow of water when needed.
Plumbing fixtures can be either decorative or functional, depending on their design and purpose. They are usually installed in a convenient location for easy access and use. For example, a faucet or toilet is often located in the bathroom for easy accessibility. However, many homeowners decide to install decorative fixtures in their homes, such as a hammered copper tub or designer sink.
Many homeowners ask whether they can paint their plumbing fixtures. The answer is yes, but it is important to understand that they must be painted with a special type of paint that can withstand repeated exposure to moisture. Plumber-approved paints are available at most hardware stores and are formulated to resist the effects of water and condensation.
It is also important to note that you should never use oil-based paint on any fixture, as it can cause the finish to crack and peel over time. Additionally, if you are planning to sell your home in the future, it may be wise to invest in contractor-grade metal fixtures rather than retail-grade plastic ones.
Another important thing to keep in mind is that your plumbing fixture must be properly vented. Venting helps to maintain water pressure and prevents the buildup of odors and waste in your home’s plumbing lines. There are specific rules and guidelines that dictate how many fixtures can share the same vent stack, and it is important to consult with your plumber to ensure your home’s plumbing is up to code.
Plumbing Installation
Plumbing systems include pipes, fixtures, and appliances that facilitate water, gas, and waste disposal in residential, commercial, and industrial settings. Plumbers install and repair these systems, ensuring that they are functional and safe for occupants. They are also responsible for ensuring that all plumbing work meets regulatory requirements. Plumbers use a variety of tools and techniques to perform their job duties, including soldering, pipe cutting, threading, solvent welding, and push-fit fittings.
During the installation of new plumbing, plumbers must follow blueprints and building codes to ensure that all components are properly connected and sized. They may need to cut holes in floors, walls, and ceilings to accommodate pipes and install drains, toilets, sinks, and water heaters. They must also determine the best location for valves and other fixtures, considering factors such as water flow and pressure, accessibility, noise levels, and ventilation.
After installing a plumbing system, plumbers must test it to ensure that all components are functioning correctly. This includes checking for leaks, adjusting water pressure, and confirming that all fixture connections are secure. Plumbers are also expected to provide customers with advice on maintenance and energy efficiency.
Service and repair plumbers typically work in residential settings, performing routine maintenance and emergency repairs on plumbing fixtures such as toilets, showers, faucets, and sinks. They may also install and repair dishwashers, washing machines, clothes dryers, and other household appliances. In this role, plumbers must be able to understand the operating instructions for each appliance and make accurate repairs. They also must be comfortable working in confined spaces and interacting with homeowners.
Due to the nature of their work, plumbers must have a strong work ethic and be willing to learn new skills. They must also be able to adapt to an unpredictable schedule, as they are often called out to address plumbing emergencies at inconvenient times. This can require them to work evenings, weekends, and on-call shifts. Having good communication skills is also important for plumbers, as they must be able to explain complex technical problems in ways that are easy to understand.
Plumbing Repair
Plumbers repair and maintain the piping that delivers fresh water, removes waste, and regulates the indoor climate. Their duties may include examining and testing plumbing fixtures and appliances to ensure they work properly; installing new pipes, valves, and sinks; connecting gas lines; and performing routine maintenance on drains and toilets.
Plumbers also collaborate with architects and construction teams to ensure that plumbing is integrated into building projects from the start. This involves working with blueprints and technical specifications to create piping that meets local regulations. They also train apprentices and supervise them as they perform their work.
Residential plumbers specialize in repairing and maintaining plumbing systems in homes and apartments. They install plumbing fixtures like sinks, toilets, showers, and bathtubs, and they connect septic tanks to household pipes. They also work on larger-scale water supply and drainage systems for multifamily dwellings. This type of plumbing usually requires more advanced knowledge and skills than the simpler tasks performed by commercial plumbers.
Commercial and industrial plumbers focus on larger-scale plumbing systems in office buildings, hospitals, manufacturing plants, and other large structures. These jobs require more complex installations and repairs, as well as the use of more specialized equipment. In some cases, these plumbers may be required to travel to different locations to service their clients’ needs.
All plumbers must have strong analytical and critical thinking skills to troubleshoot issues and make informed decisions on the spot. They also need to be able to read and interpret blueprints and technical documents. Additionally, they must have good physical strength and stamina to lift heavy tools and equipment. Plumbers often work in tight spaces, so they need to be comfortable working in small areas with limited visibility.
Because plumbers are responsible for ensuring the safety of their clients, customers, and coworkers, they must follow all applicable health and safety standards. This includes wearing protective gear when handling hazardous materials, such as lead and asbestos, and following all relevant environmental regulations. They must also keep up with continuing education requirements to stay abreast of new technology and best practices in the industry.